Overview
Google Forms provide an easy to use form creation interface which can allow you to quickly get your form up on the internet. The data submitted to Google Forms remains in the cloud and is not sent over email. One or more users can subscribe to the form in order to receive notifications that a submission has been made.
Benefits
- The user interface for creating a form via Google Forms is easy to learn and is fairly intuitive
- Submission data is kept up in the cloud. No more emails getting lost in the junk email folder. You can see and analyze all the data going back to the form's initial publication
- A greater range of input types is available
Drawbacks
- Typical form use-case is to link from a UAS web page to the form itself, housed by Google. There are ways to embed the form onto a UAS web page but it can be tricky to get it to appear clean.
- The Google Form itself does not retain the typical look and feel of the UAS website.
Form Creation Resources
The first step is to actually create the Google Form. Some resources to get you going:
- G Suite (Google Apps) Learning Center guide: "Get started with Forms"
- Eric Curts' guide, "Using Google Forms"
Form Tips
Decide if you need a Google Sheet to store data
If you'd like to do any processing on the data as it's coming in you will want to save form responses in a Google Sheet. This isn't required if you are just would like to view form responses or export submissions occasionally.
Restricting to UA Users
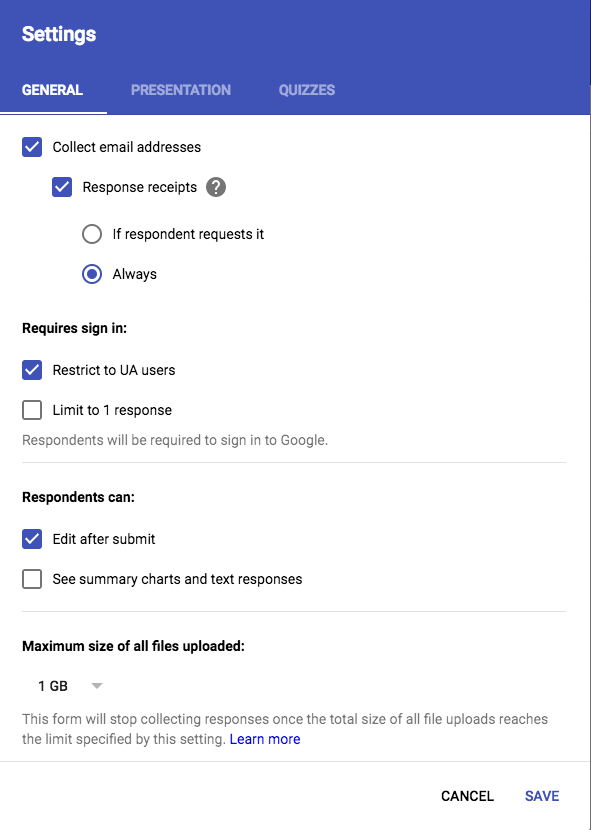
If you'd like to restrict form submission to University of Alaska staff, faculty, and students only, you'll need to make an adjustment to the form. Click on the gear icon in the upper right portion of the screen and check the "Restrict to UA users" option to require UA login.
Test!
Make sure your form works well: test at all stages of development.
Submitting your Form
Sharing with the webmaster
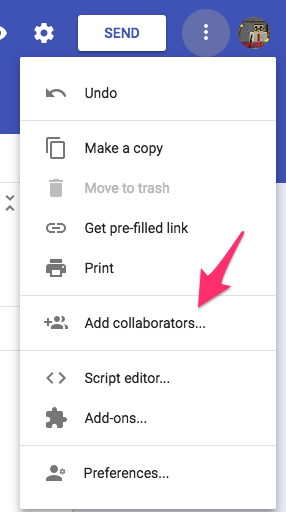
Once your form is complete, you're almost ready to go! The next step is to share the form (and its associated Google Sheet, if so linked) with the webmaster ([email protected]):
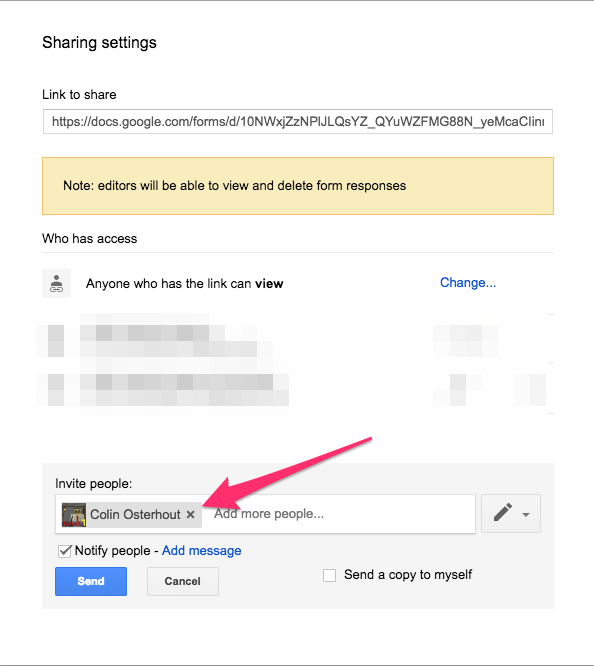
Webmaster assigns form to institutional user
At this stage the webmaster will assign the form to an insitutional user and share it back out with you. This process runs automatically overnight. This ensures that this form remains valid indefinitely even if your account is ever deleted, which will purge your documents.
Ready to add link to your page!
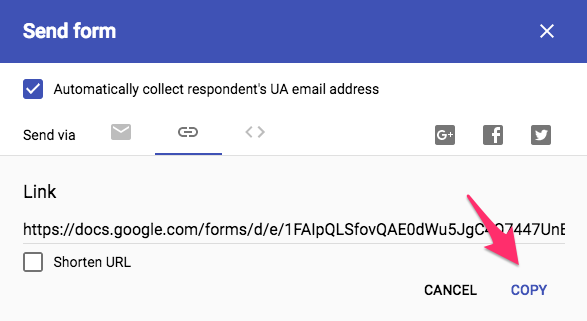
Once you are re-shared on the form you're ready to add the link to the new form onto your page. Click on the "Send" button on your form and then "Copy" the link.
Receiving Form Submission Notifications
In order to receive notice that someone has completed your form you need to go through a couple of steps. Any of the collaborators of the document can receive notifications in this fashion. There's a couple of ways of doing this: either within the form itself or through a Google Sheet that can store the submission data.
Through the form
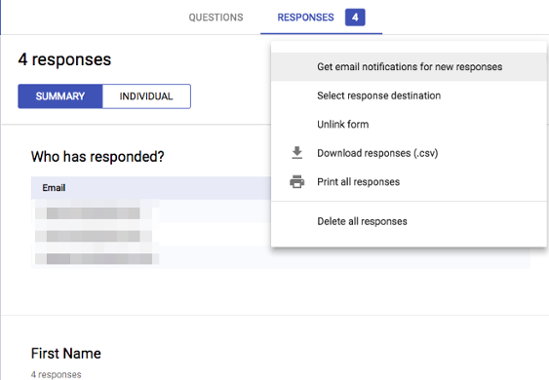
Under the "Responses" pane on the form, click on the "3-dot" icon. Select "Get email notifications for new responses":
Through the Google Sheet
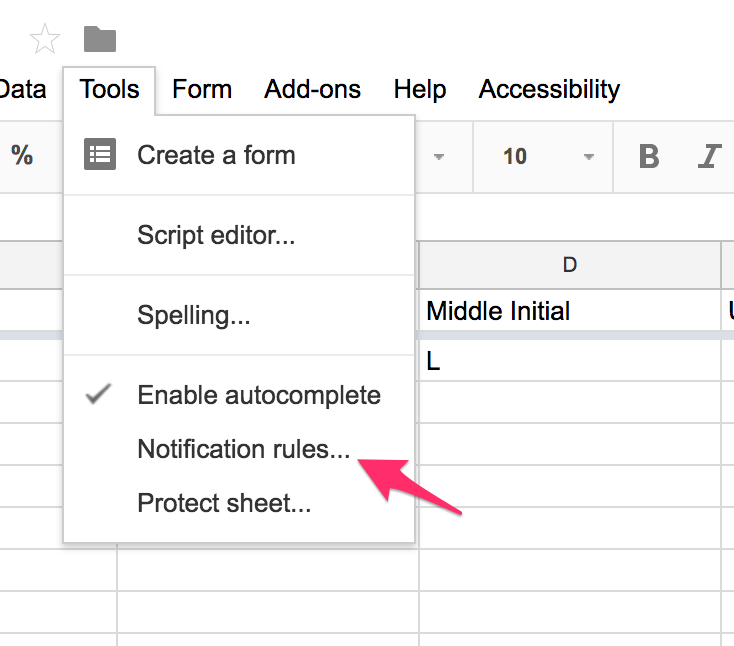
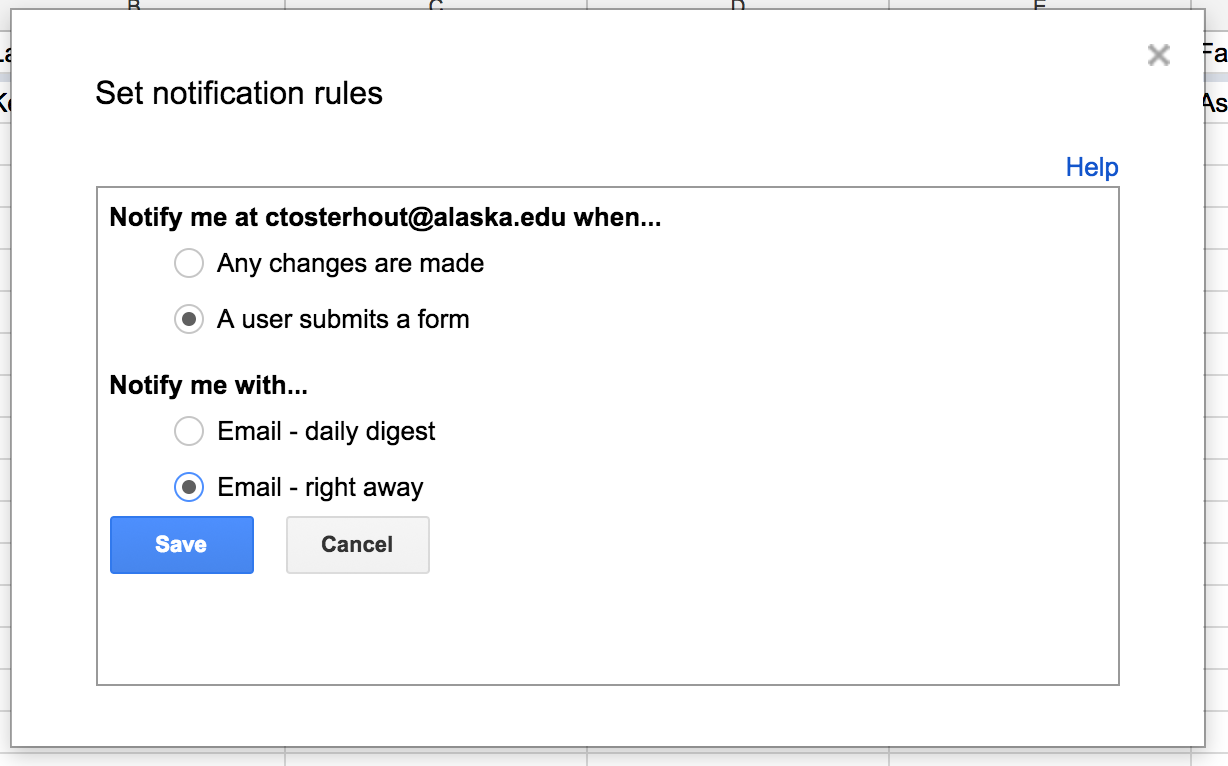
If you created the form with a linked Google Sheet you can receive notifications through the sheet itself:
